Enable YourWelcome Advance
Set Up & Enable Online Check-In
Overview
In order to start sharing check-in links, you’ll need to add a property to share them from. Each property added to the YourWelcome platform has its own calendar, where all reservations relating to it are stored. You can add properties by creating them manually, or by connecting a third-party calendar (via a PMS or OTA).
When your properties are set up, you need to enable YourWelcome Advance on them – this must be done before you can start sending online check-in links.
Before you can start sending advance check-in notifications, you need to set up at least one property to add them to. You can also set up properties after connecting your PMS or OTA account.
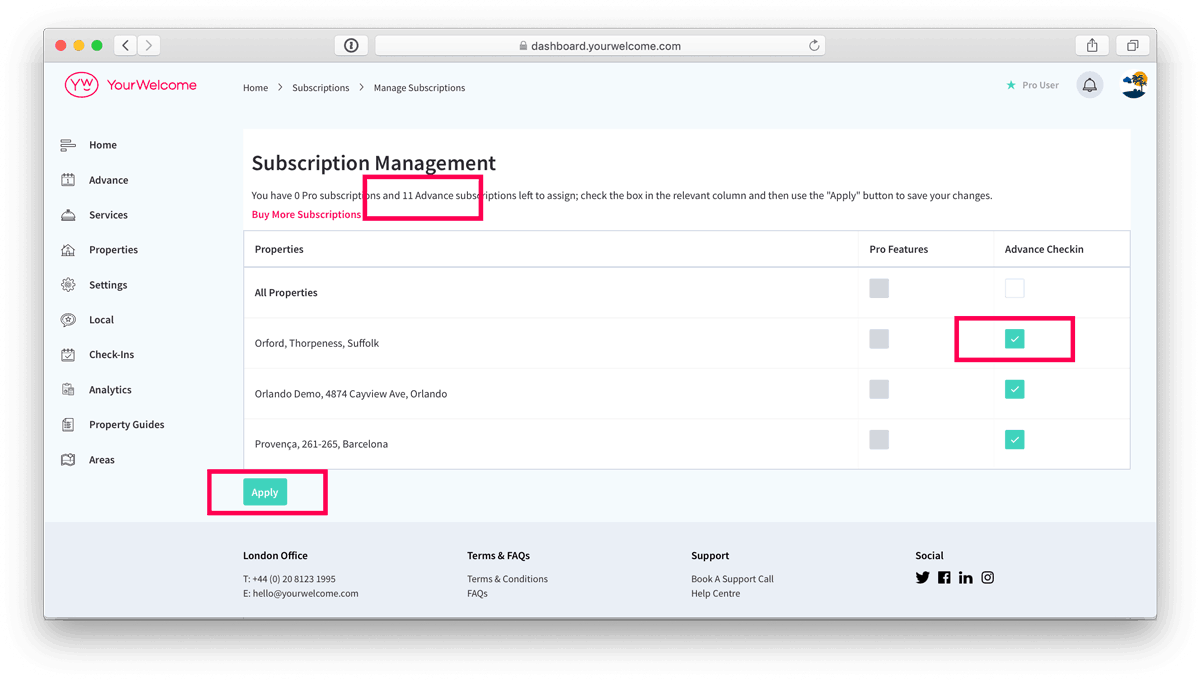
YourWelcome Advance is enabled on a per-property basis, so you’ll need an active subscription for each property that you want to enable YWA on. You apply this via the Manage Subscription page in the dashboard (see more details below).
Enabling Advance
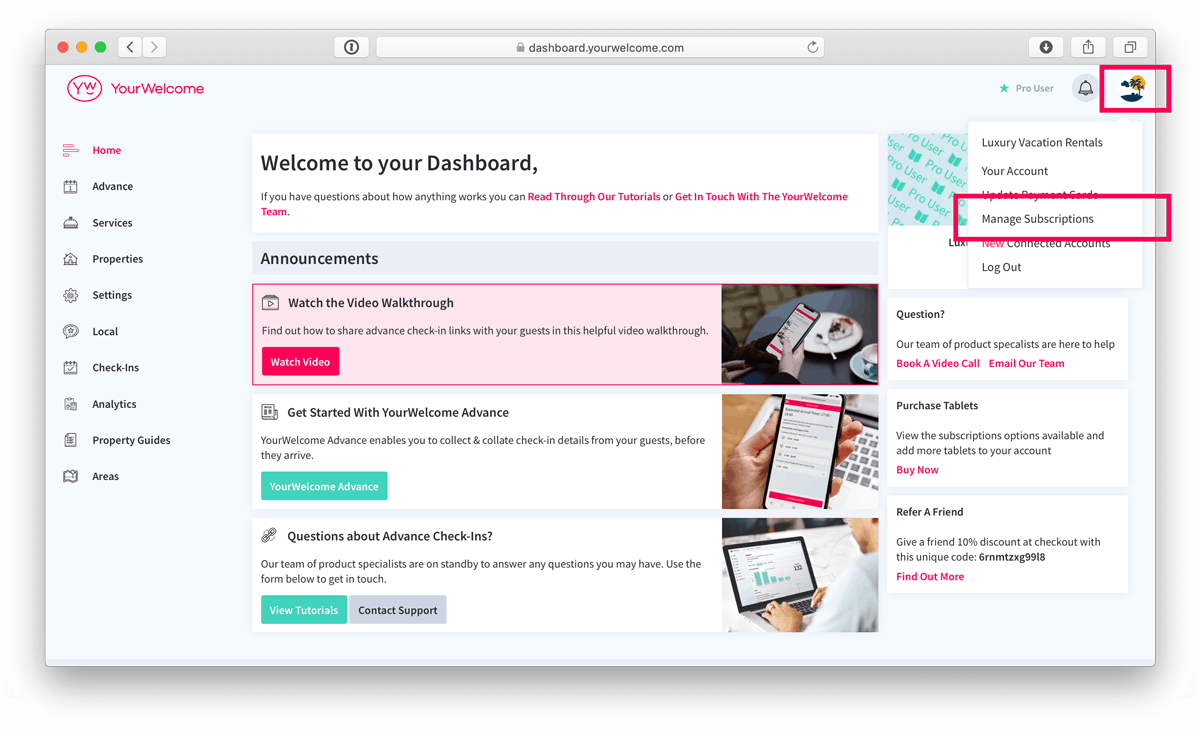
Select the Manage Subscriptions section from the Account dropdown in the top right of your dashboard

Now choose which properties you want to activate Advance on and then select Apply. There is an indicator which tells you how many subscriptions you have left to activate.

Not the answer you were looking for or still need a little help?
Get in touch with the YourWelcome support team, who will be happy to help.
