Included in the YourWelcome Advance plan is a fully customisable messaging agent. This gives you everything you need to create professional emails. You can use the tool to create fully branded dynamic messages by inserting shortcodes, these automatically populate the emails with booking data such as the address of the property, your cancellation policy and more.
Messages
Messages consist of text and image content and can include calls to actions (CTAs). A CTA is a button that encourages someone to do something, for YourWelcome Advance this could be things like “Check-In Now” or “Upload your ID”.
Workflows
Workflows consist of multiple messages that will be sent to your guest in a sequence. Messages in a workflow can have conditions (known as triggers) that can stop or start a message from going out (such as only sending if a deposit is paid, or if ID is uploaded and approved etc). This ensures your guests get the right messages at the right times.
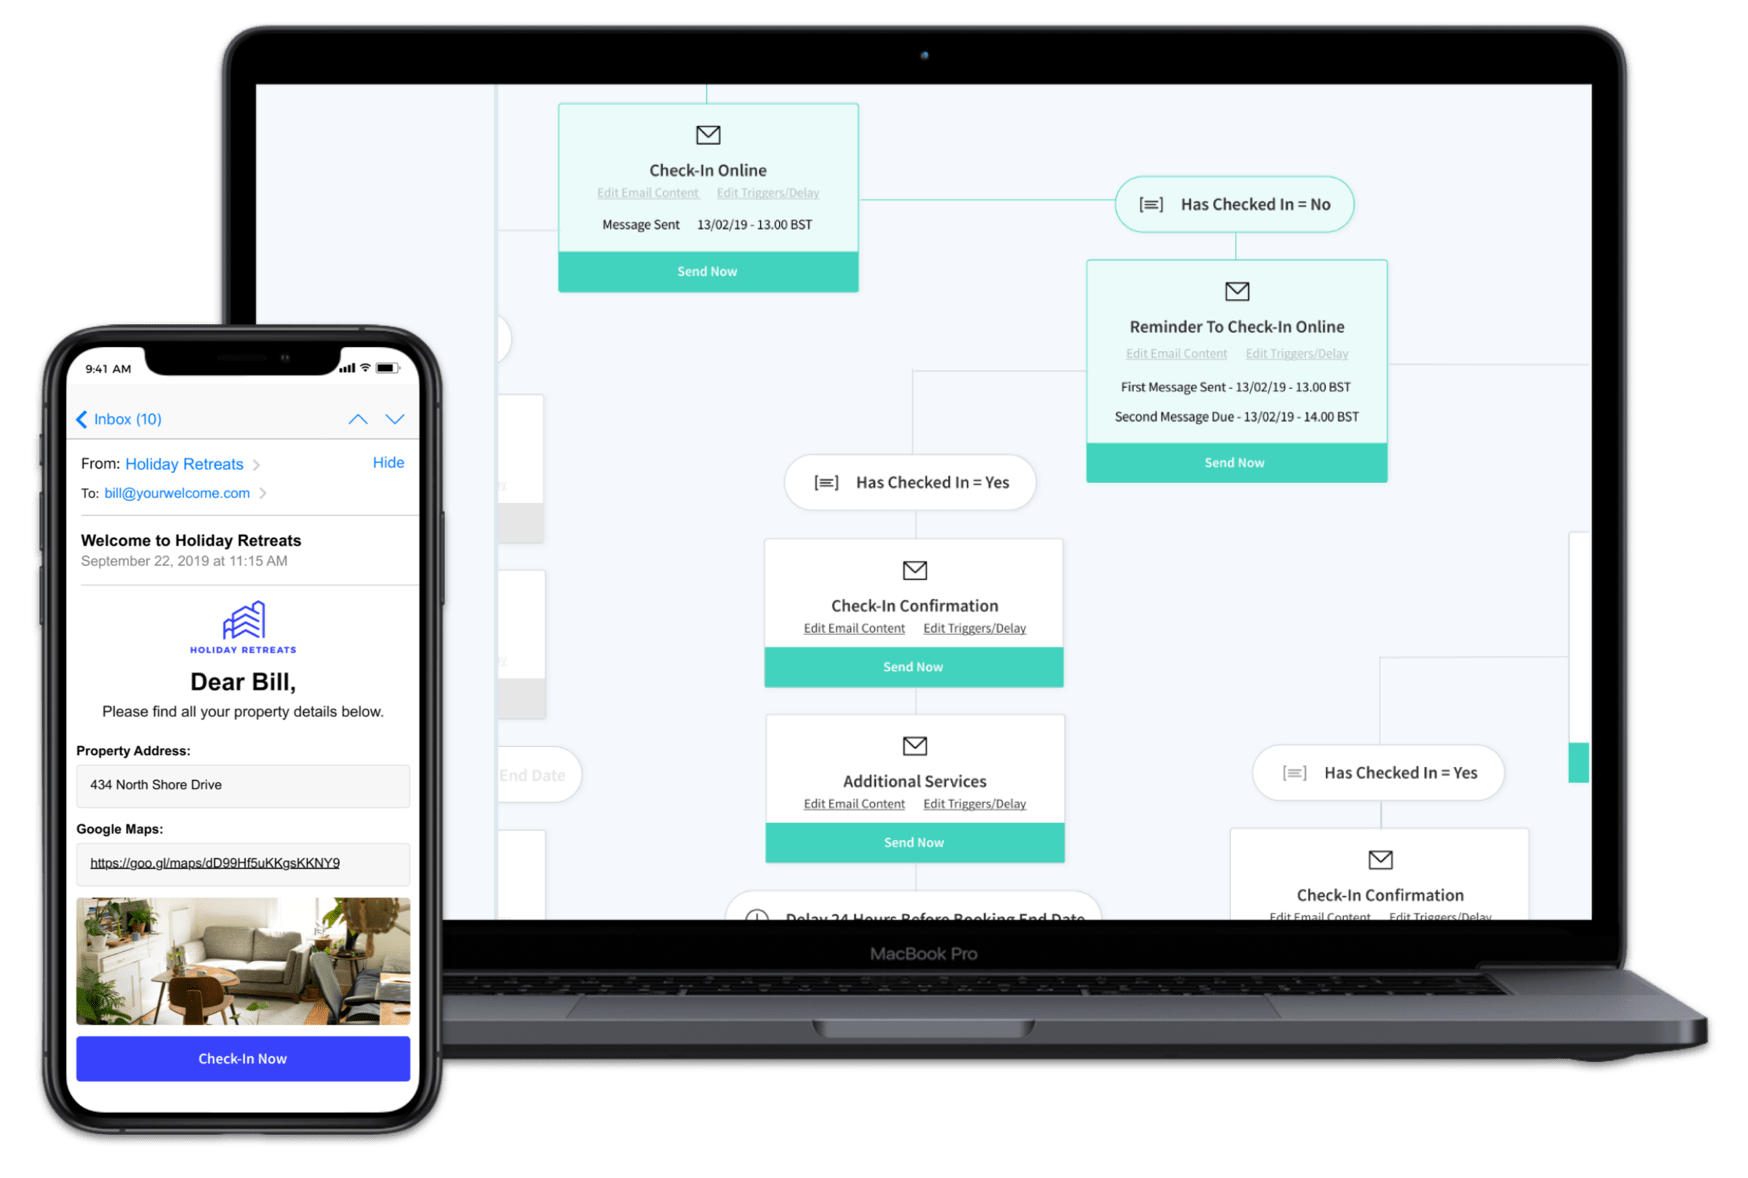
Individual Messages
Create an individual message using one of our popular templates or write your own from scratch. Within each of your messages, you can add shortcodes, imagery, external URL buttons and internal Advance buttons. Once you have created your list of messages this is when they can be assigned to an individual workflow.
Brand Your Emails
Make each email your own by branding the emails with your logos, colors and images. All emails are mobile optimized so will look great on every device. In addition to this we have given you the ability to create message branding groups, so if you manage properties for multiple clients or have your own sub-brands who require a different look and feel to your other properties, you can then apply that groups branding to specific properties. This gives you complete flexibility and full customization over what your messages look like for each property on your account.
Shortcodes
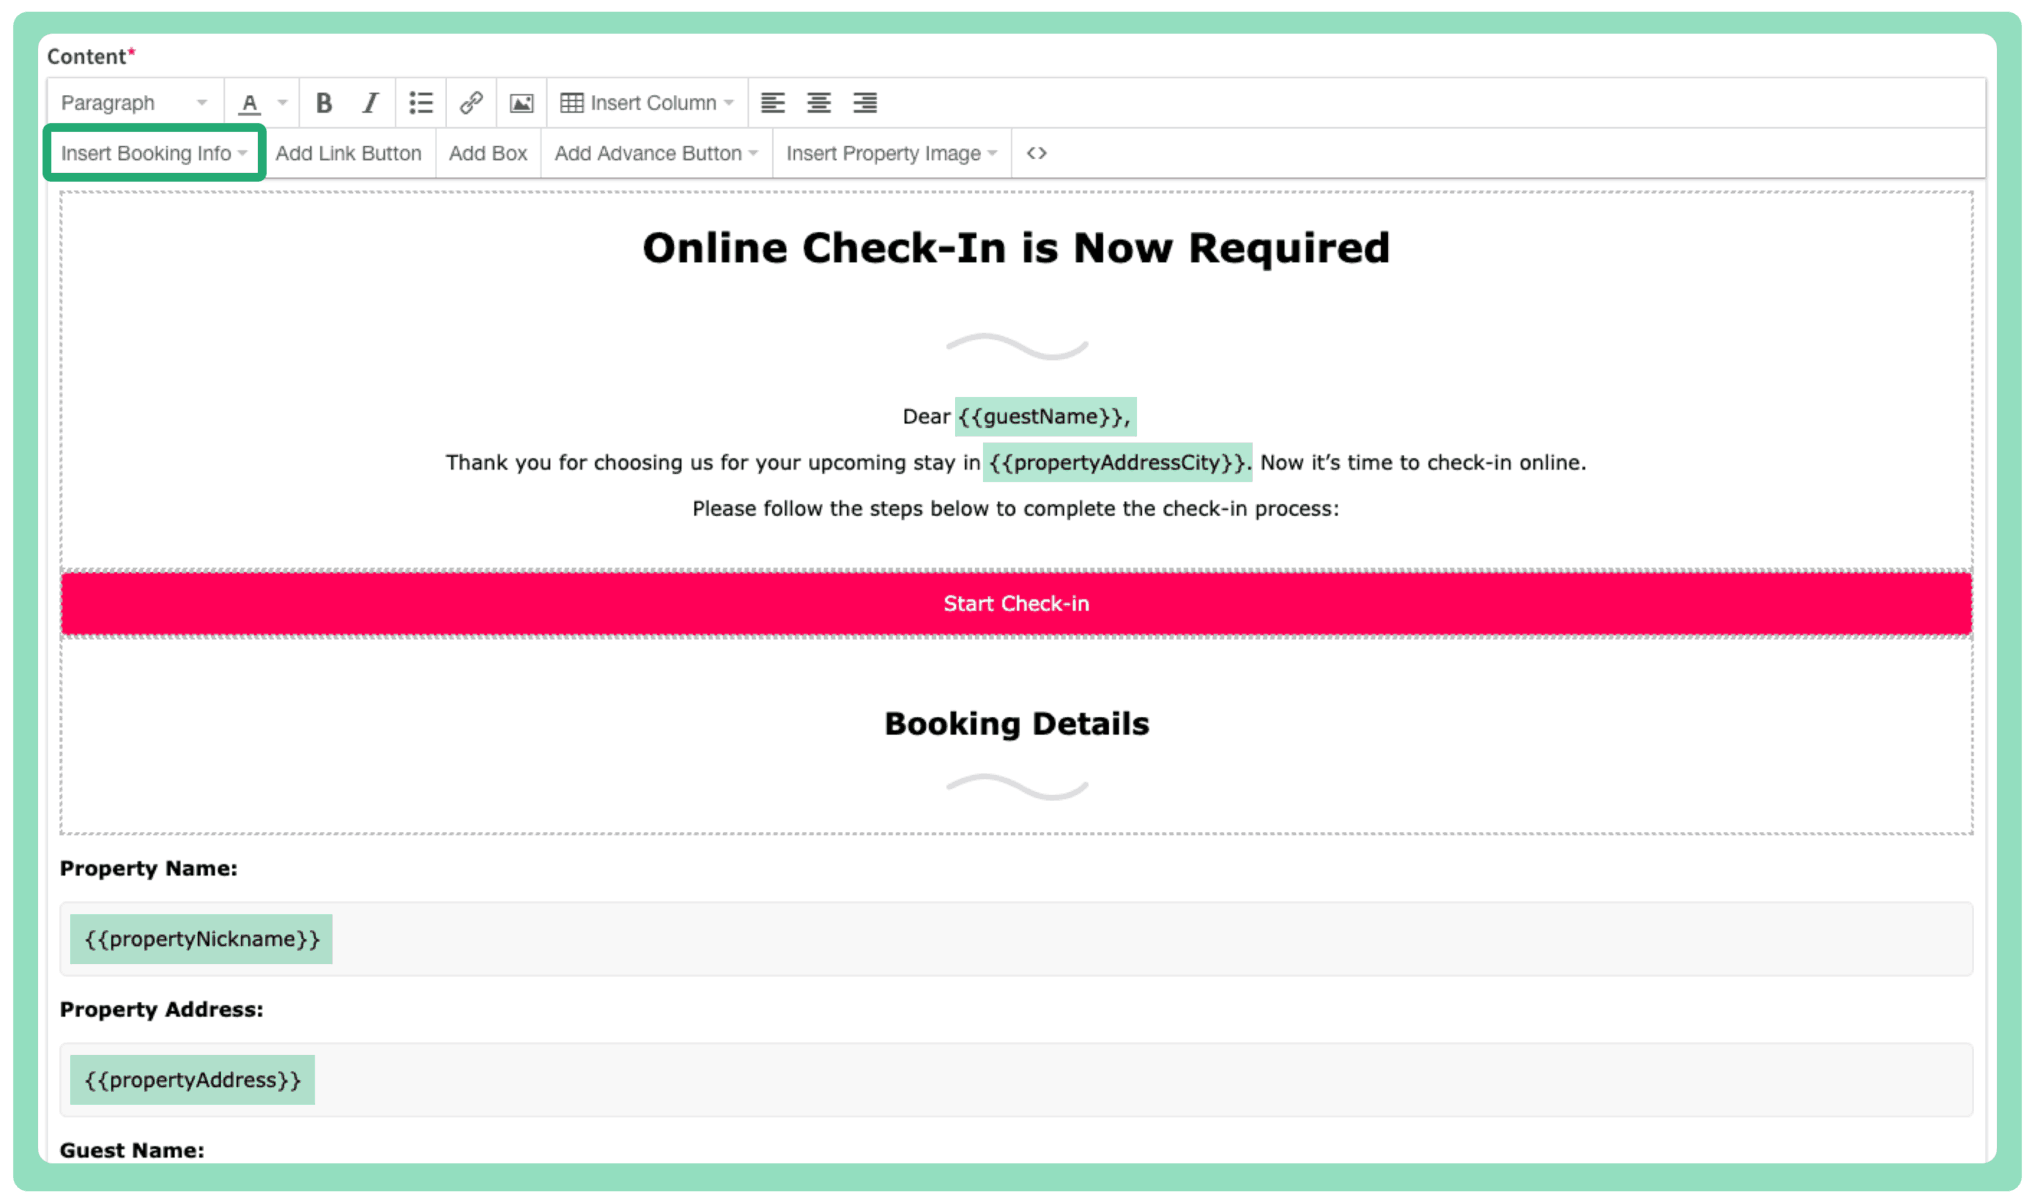
In your message content you can add shortcodes. These shortcodes will automatically populate the emails with the booking data of that specific shortcake, these could include things like the address of the property, your cancellation policy or even your checkout time.
For example Dear {{guestName}} will actually appear as Dear Bill Smith, (where Bill Smith is the name of the primary guest on your booking!). In your email editor there is a drop down named ‘Insert Booking Info’; here you will find a list of possible shortcodes that you can insert within your message copy (see example below). If you have connected to one of our available Property Management Services then you will see an additional list of shortcodes specific to that service. Note: Only use shortcodes where you are certain there is data on the booking and/or relevant property of that booking in YourWelcome’s dashboard, otherwise it will be blank in the email.
You can also create your own custom fields (on an individual property page) which then generates a Shortcodes you can insert in to your messaging. The possibilities to streamline your communications are endless.

Supportive Imagery
There are 2 types of images you can include in your emails. Fixed images which will display exactly as inserted and dynamic images which are specific to the property.
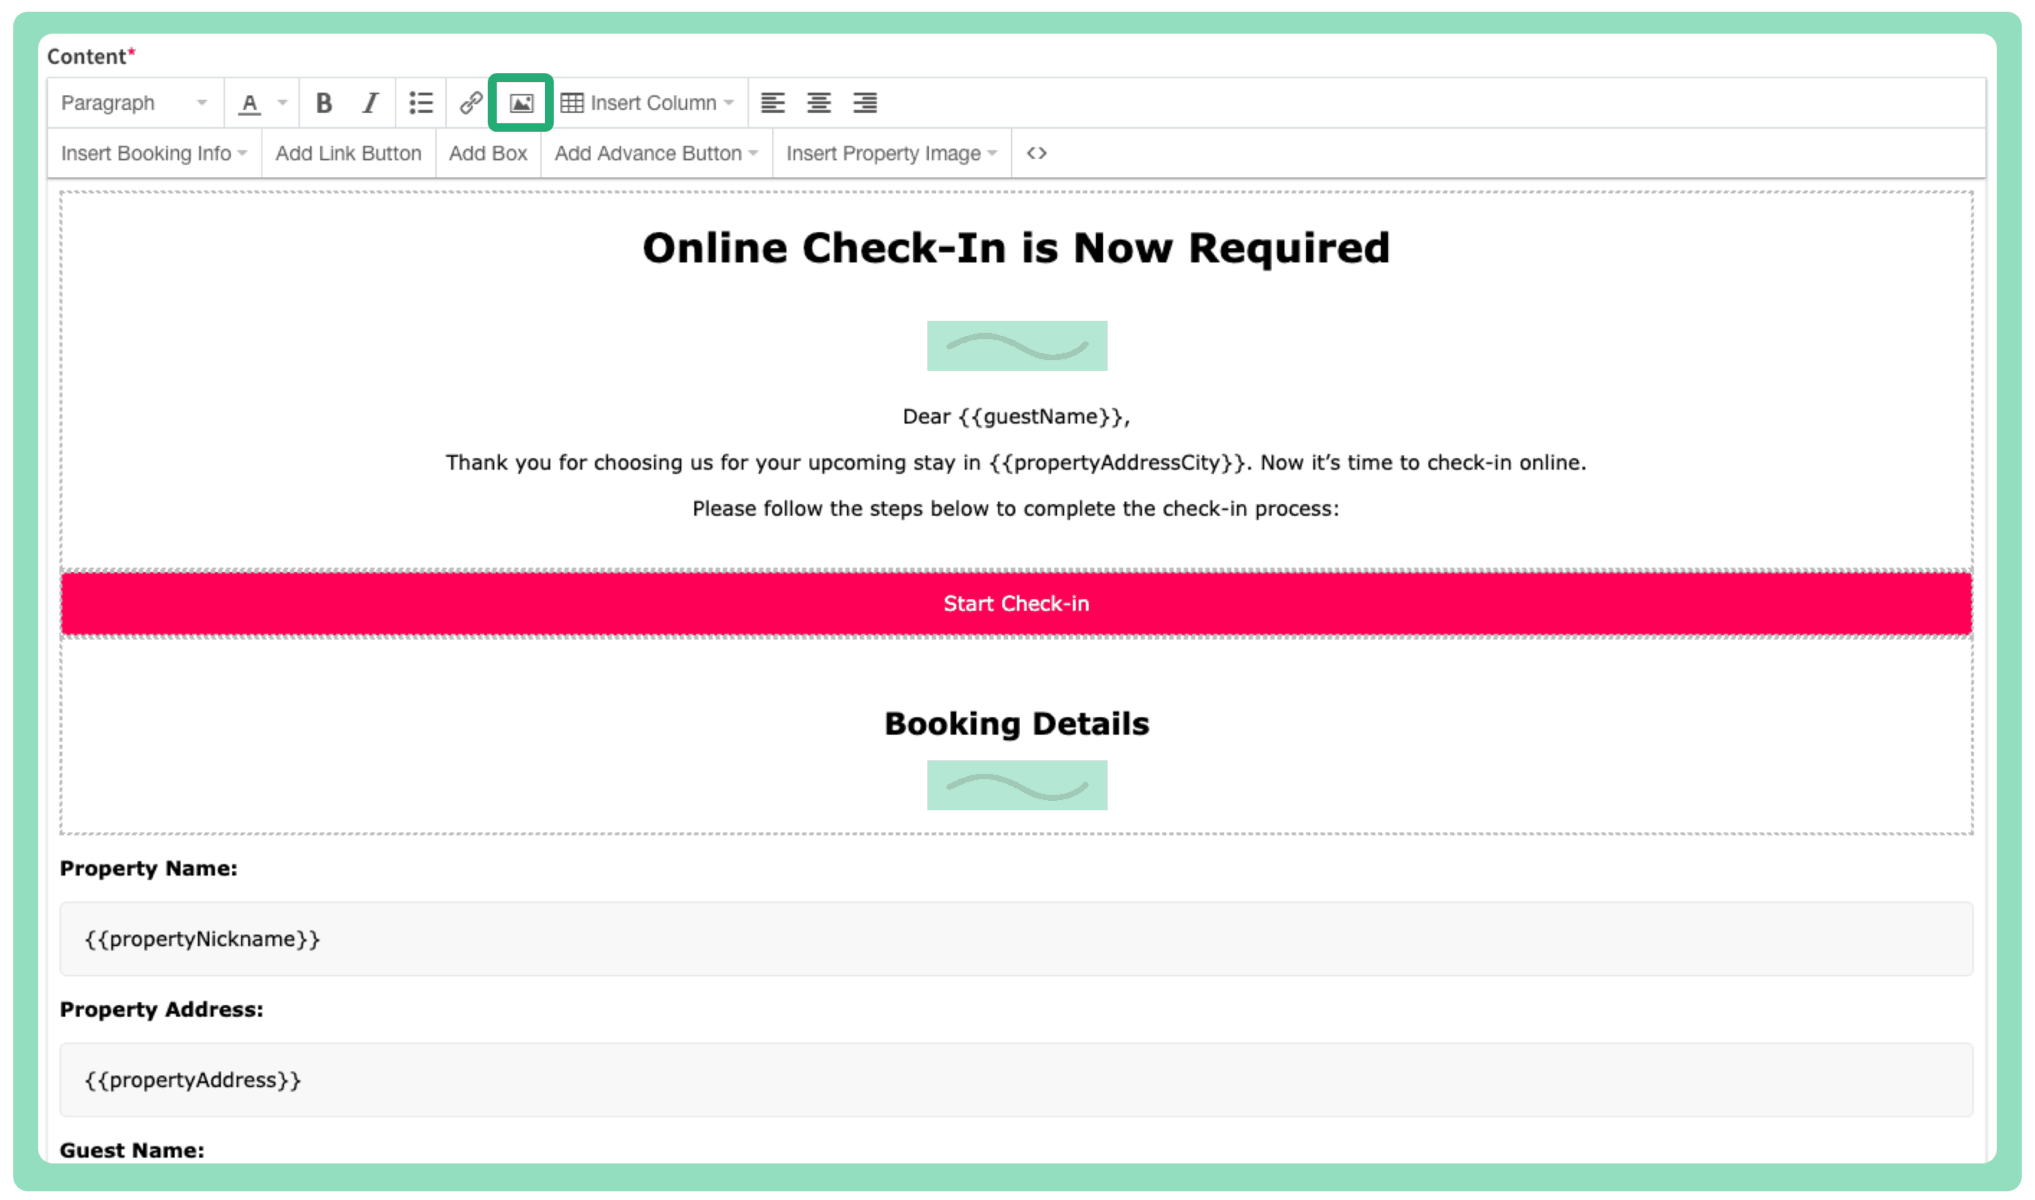
Inserting a fixed image (as per the wavy dividing line on the example below) is done by clicking the small photo icon and inserting to that email template.
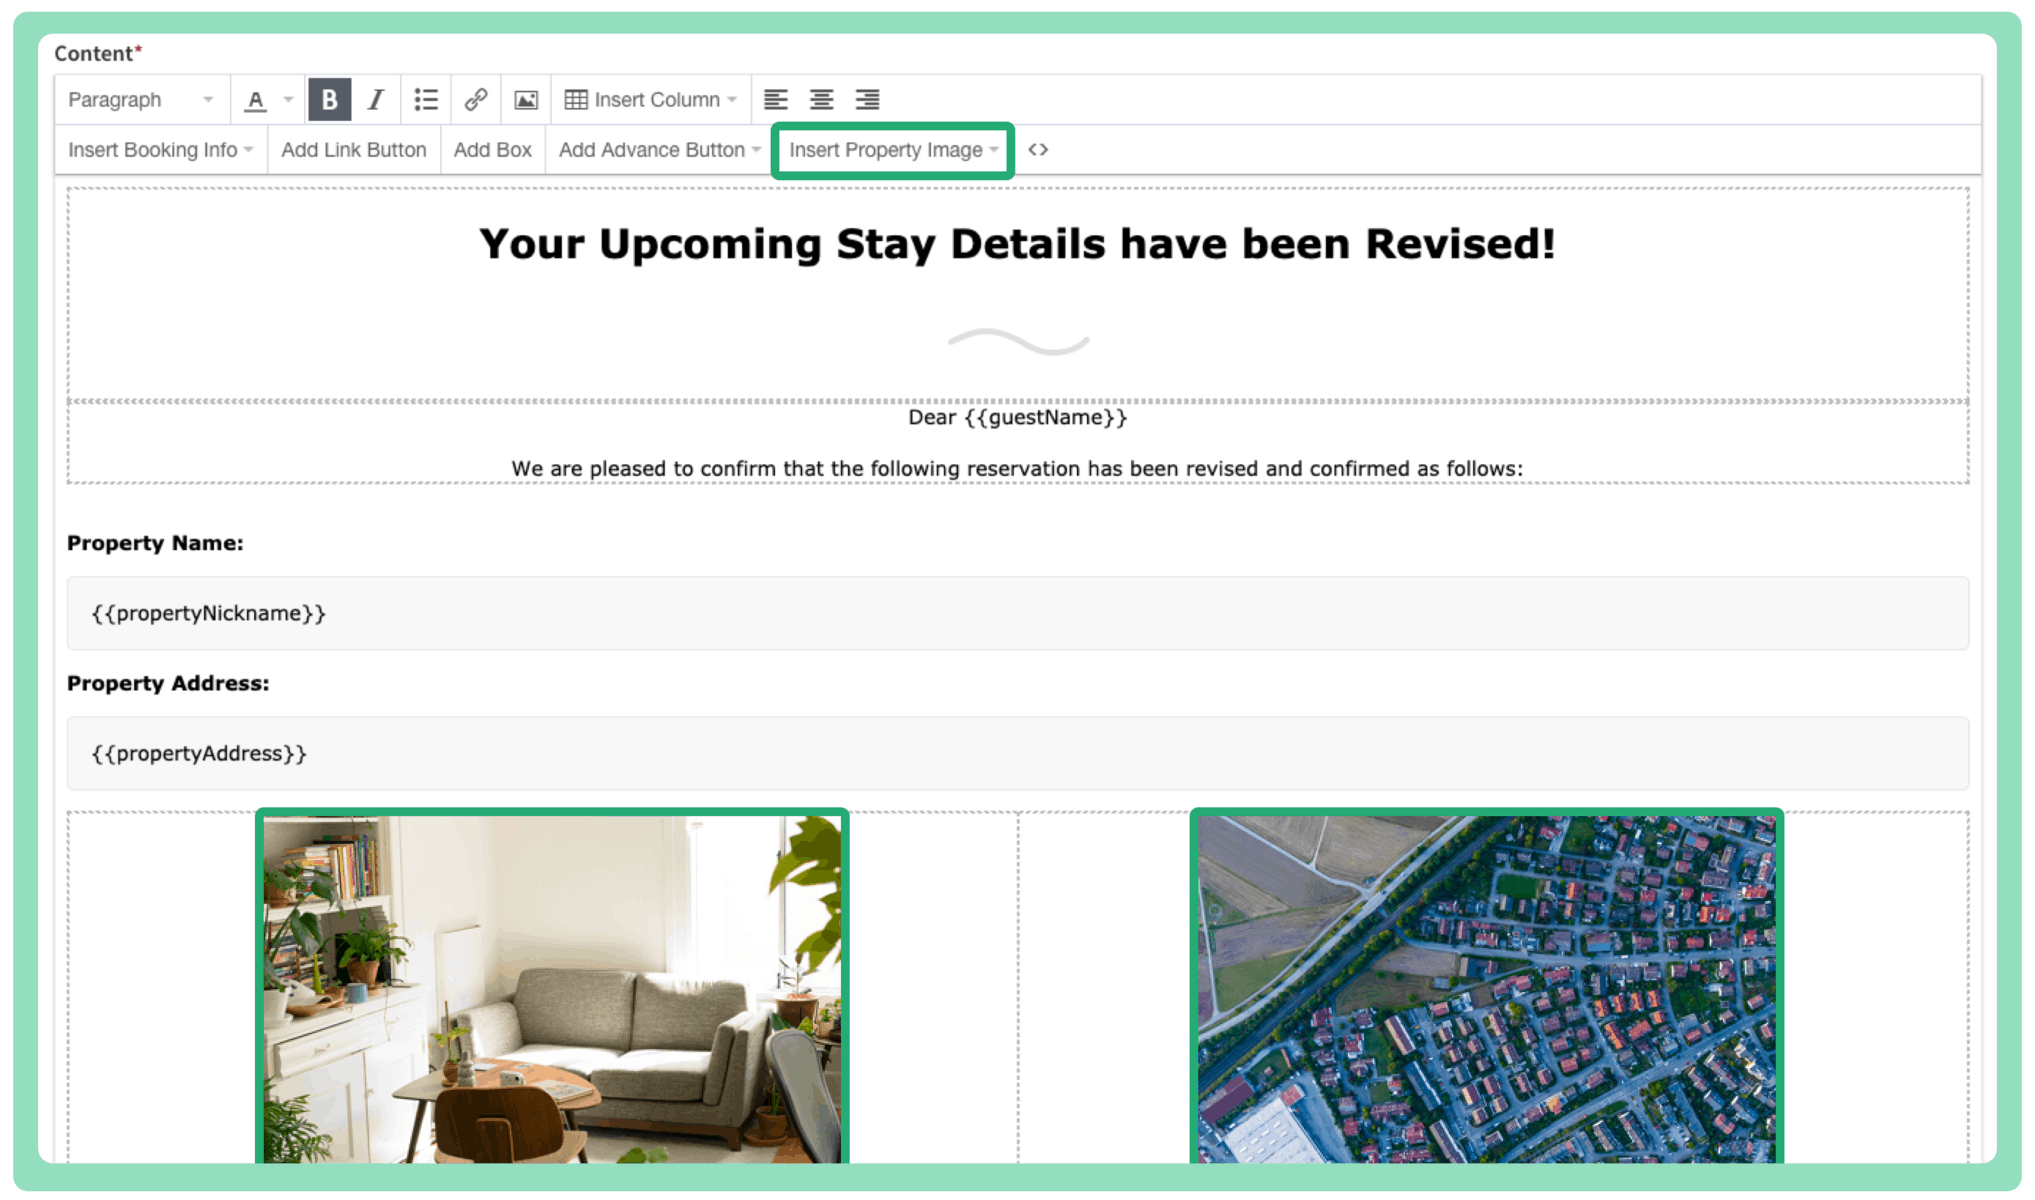
Inserting a dynamic image first requires you to add your images per property (you can do that by selecting the green house placeholder image on a chosen property page). You can upload up to 6 images per property and each time you upload an image it is automatically given a number. Within the email editor use the property image drop down and insert the number of the image you wish to place. This brings up a placeholder which you can place wherever you wish the image to appear (see example below). Once a booking has been made the dynamic image will populate the message from the images on each property. NOTE – if all your properties do not have images that section of the email will be blank for the properties without images.
Internal Advance Buttons
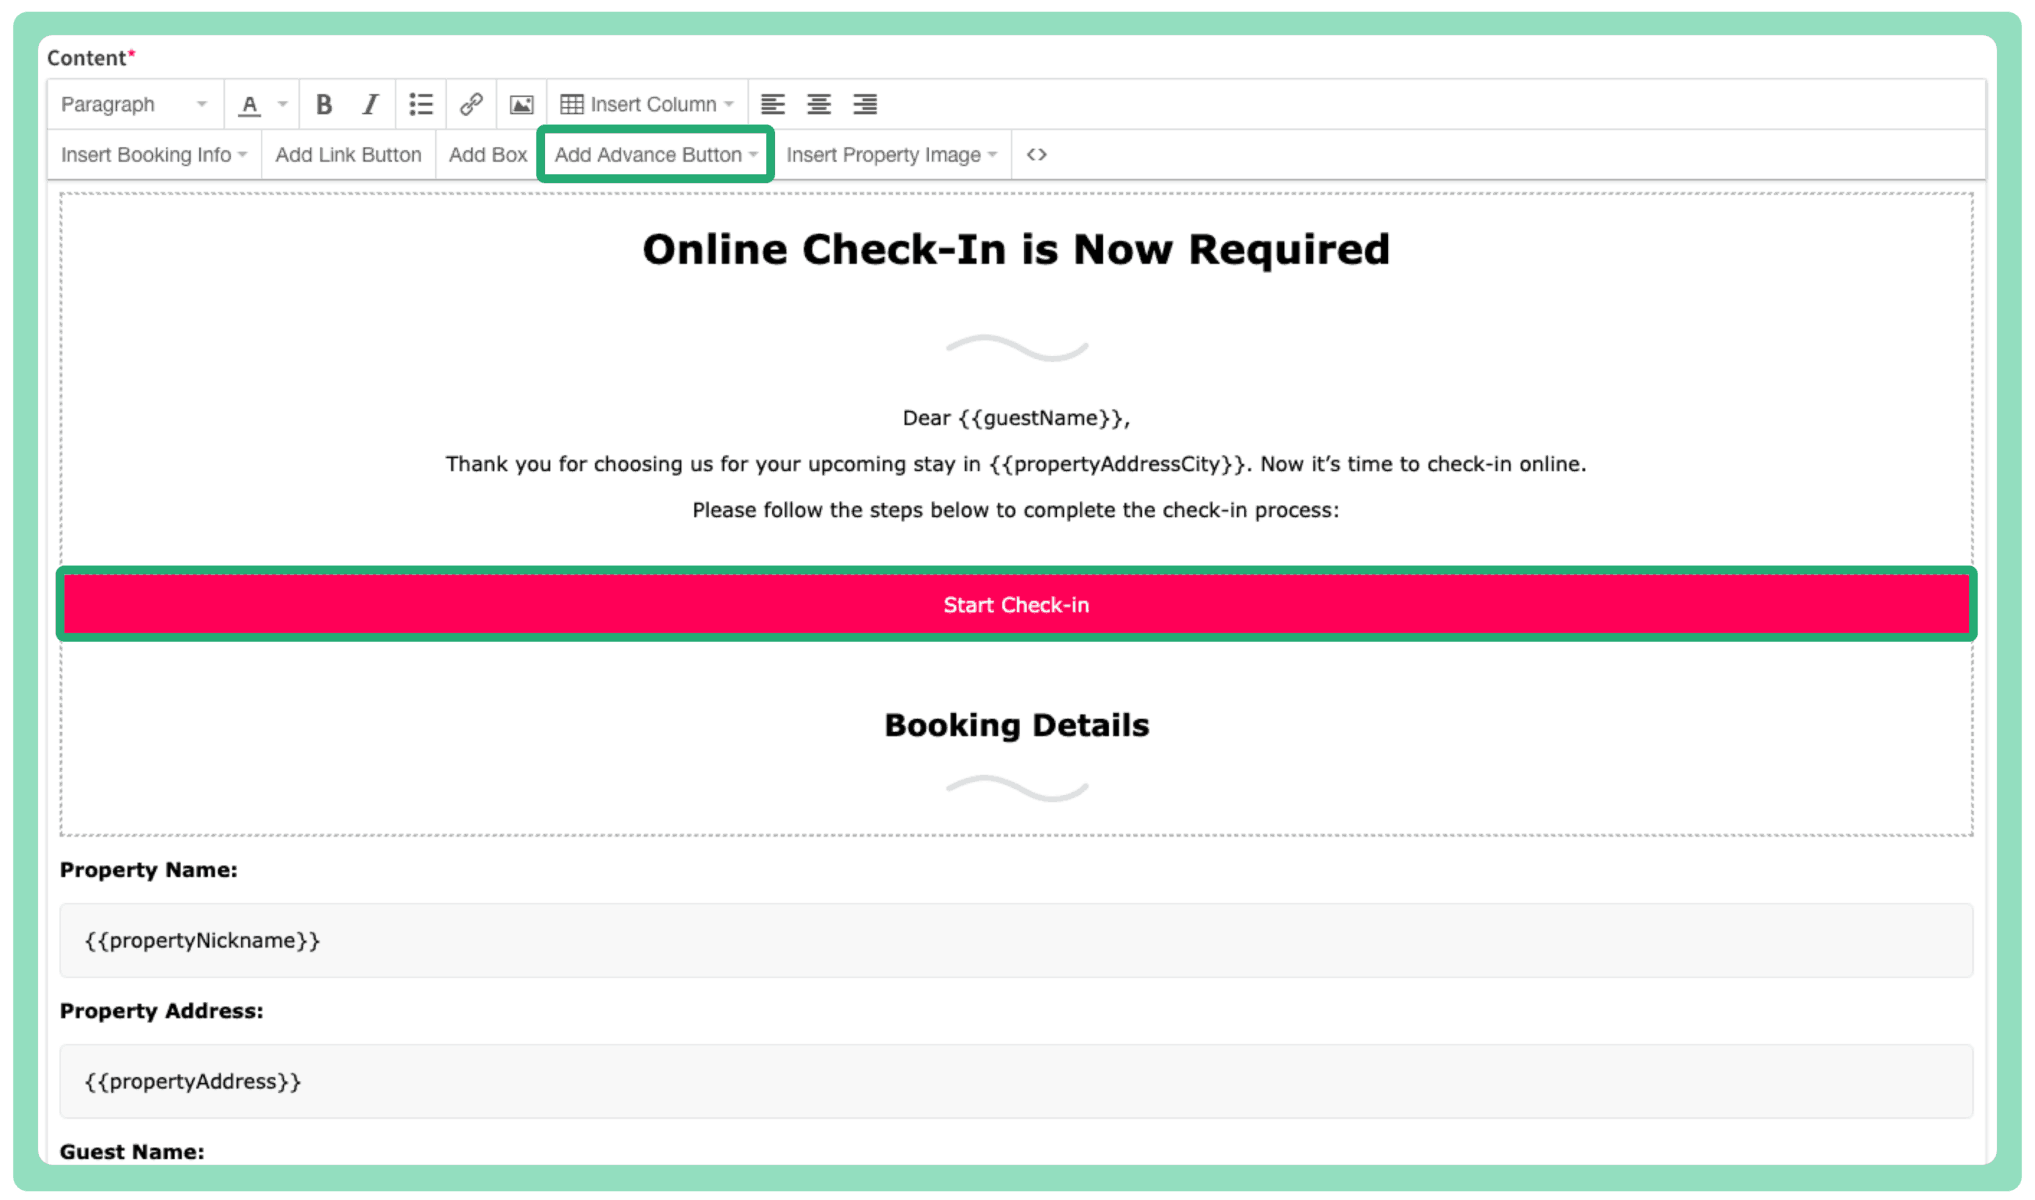
One of the main use cases of the messaging platform is to send your guests a link to your configured Advance screens. YourWelcome Advance is used to gather key information from the primary guest using a pre-arrival check-in system. Some of these screens could include capturing the guests full contact details, capturing their ID document or upselling your services to them pre-arrival. These emails can be used as a prompt to get them to complete these screens from the time the booking has been made right up until the check-in date. The information gathered is stored securely in a GDPR compliant manner in the YourWelcome dashboard.
Example email: Encouraging the guest to check-in and complete the Advance screens.
External URL Buttons
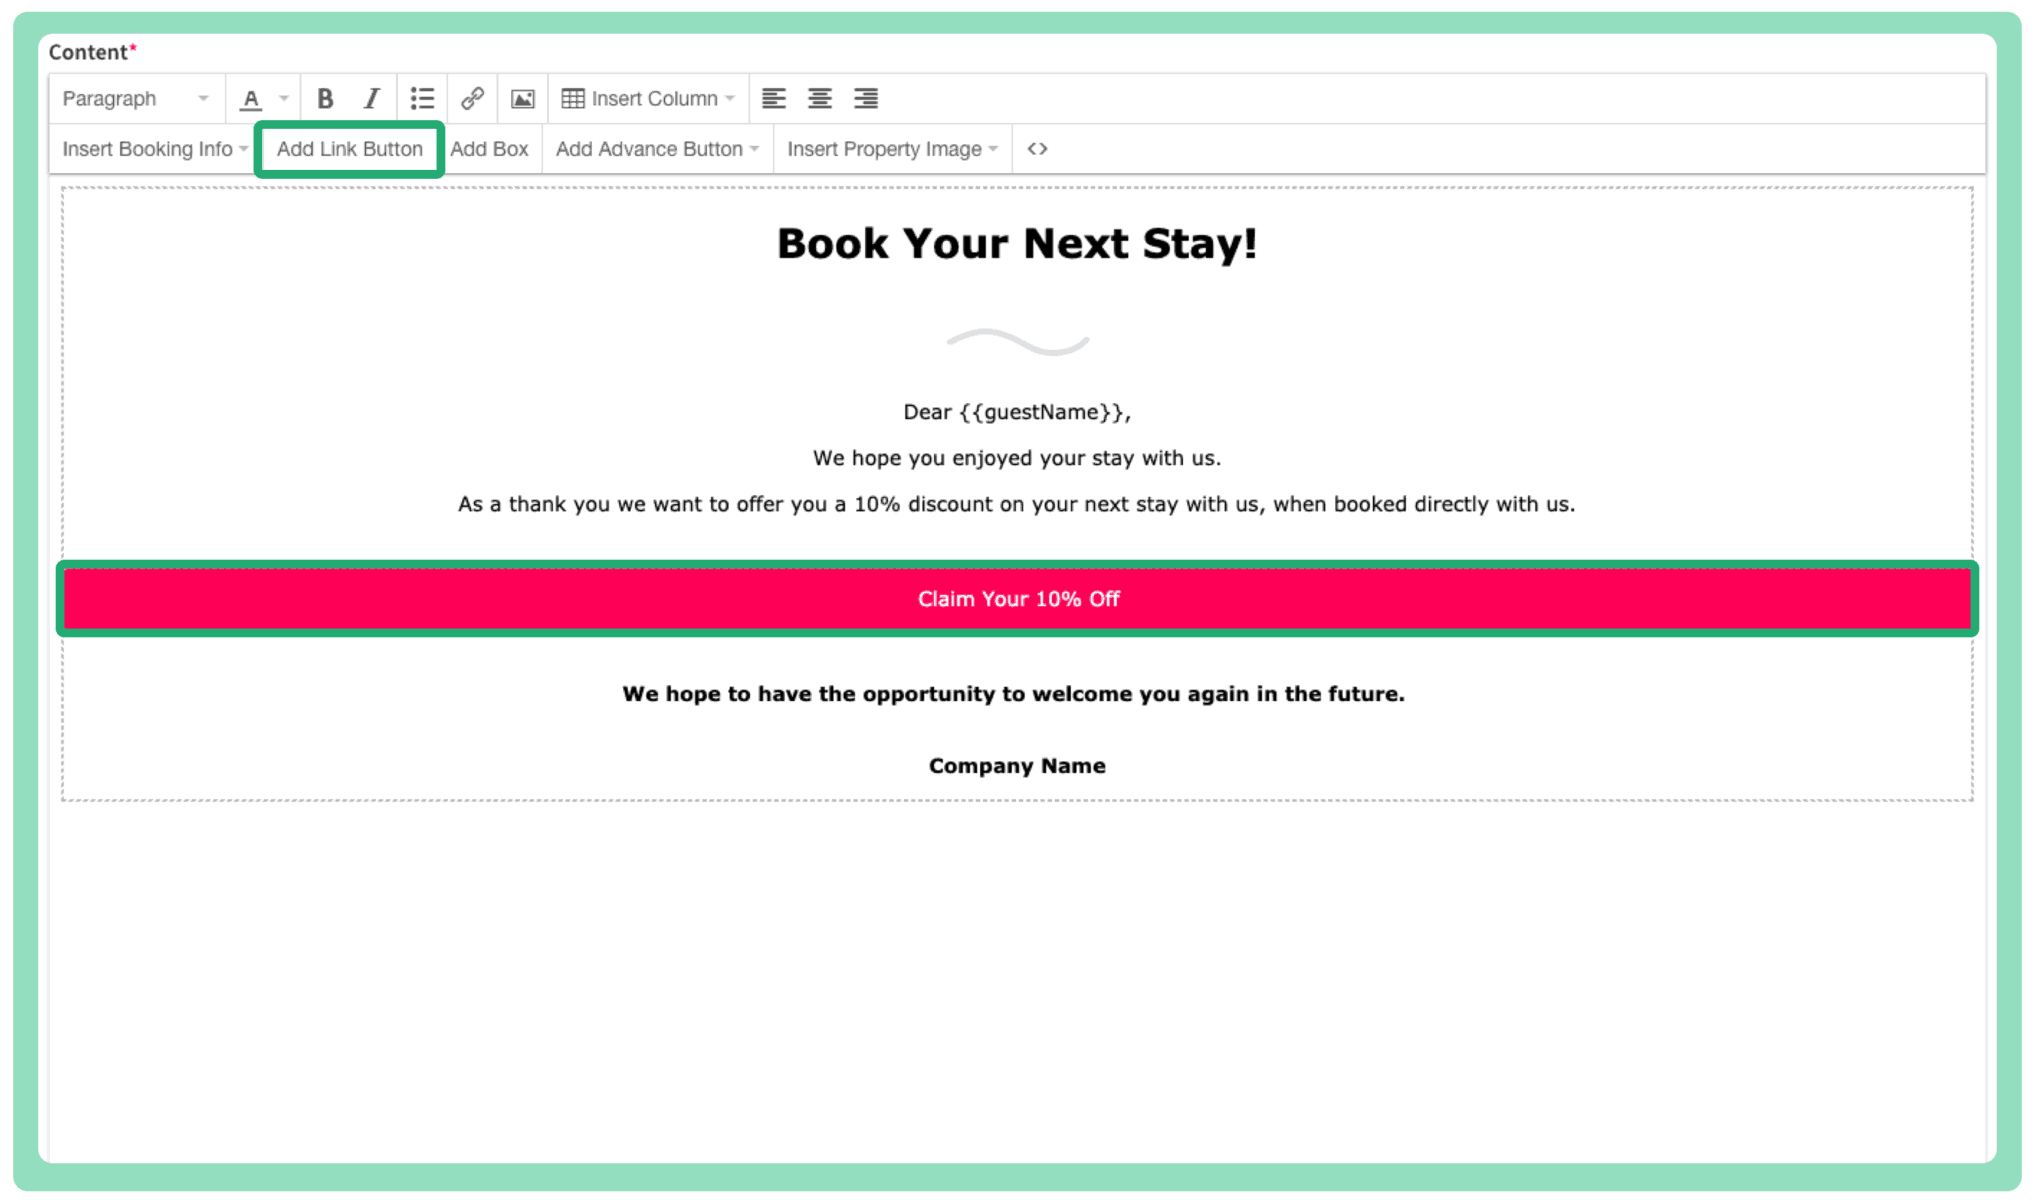
In addition to the internal Advance buttons you can add buttons within the message content to external URLs. For example these could be used within a promotional email encouraging your guests to book their next stay through a specific website URL.
Individual Workflows
Create an individual workflow using one of our popular templates or create your own from scratch using our workflow builder. Each workflow will consist of multiple messages that can have delays and triggers attached so your guests will receive the correct messages based on their actions. Whether you want an email with door codes to go out just 24 hours before check-in or a promotional services email to go out on the 3rd day of your guest’s visit, our platform can build what you need with simplicity and ease. Set emails to only be sent if a condition is met (like paying for a booking balance or deposit amount) and even set automated follow up emails if those actions aren’t done.
Triggers
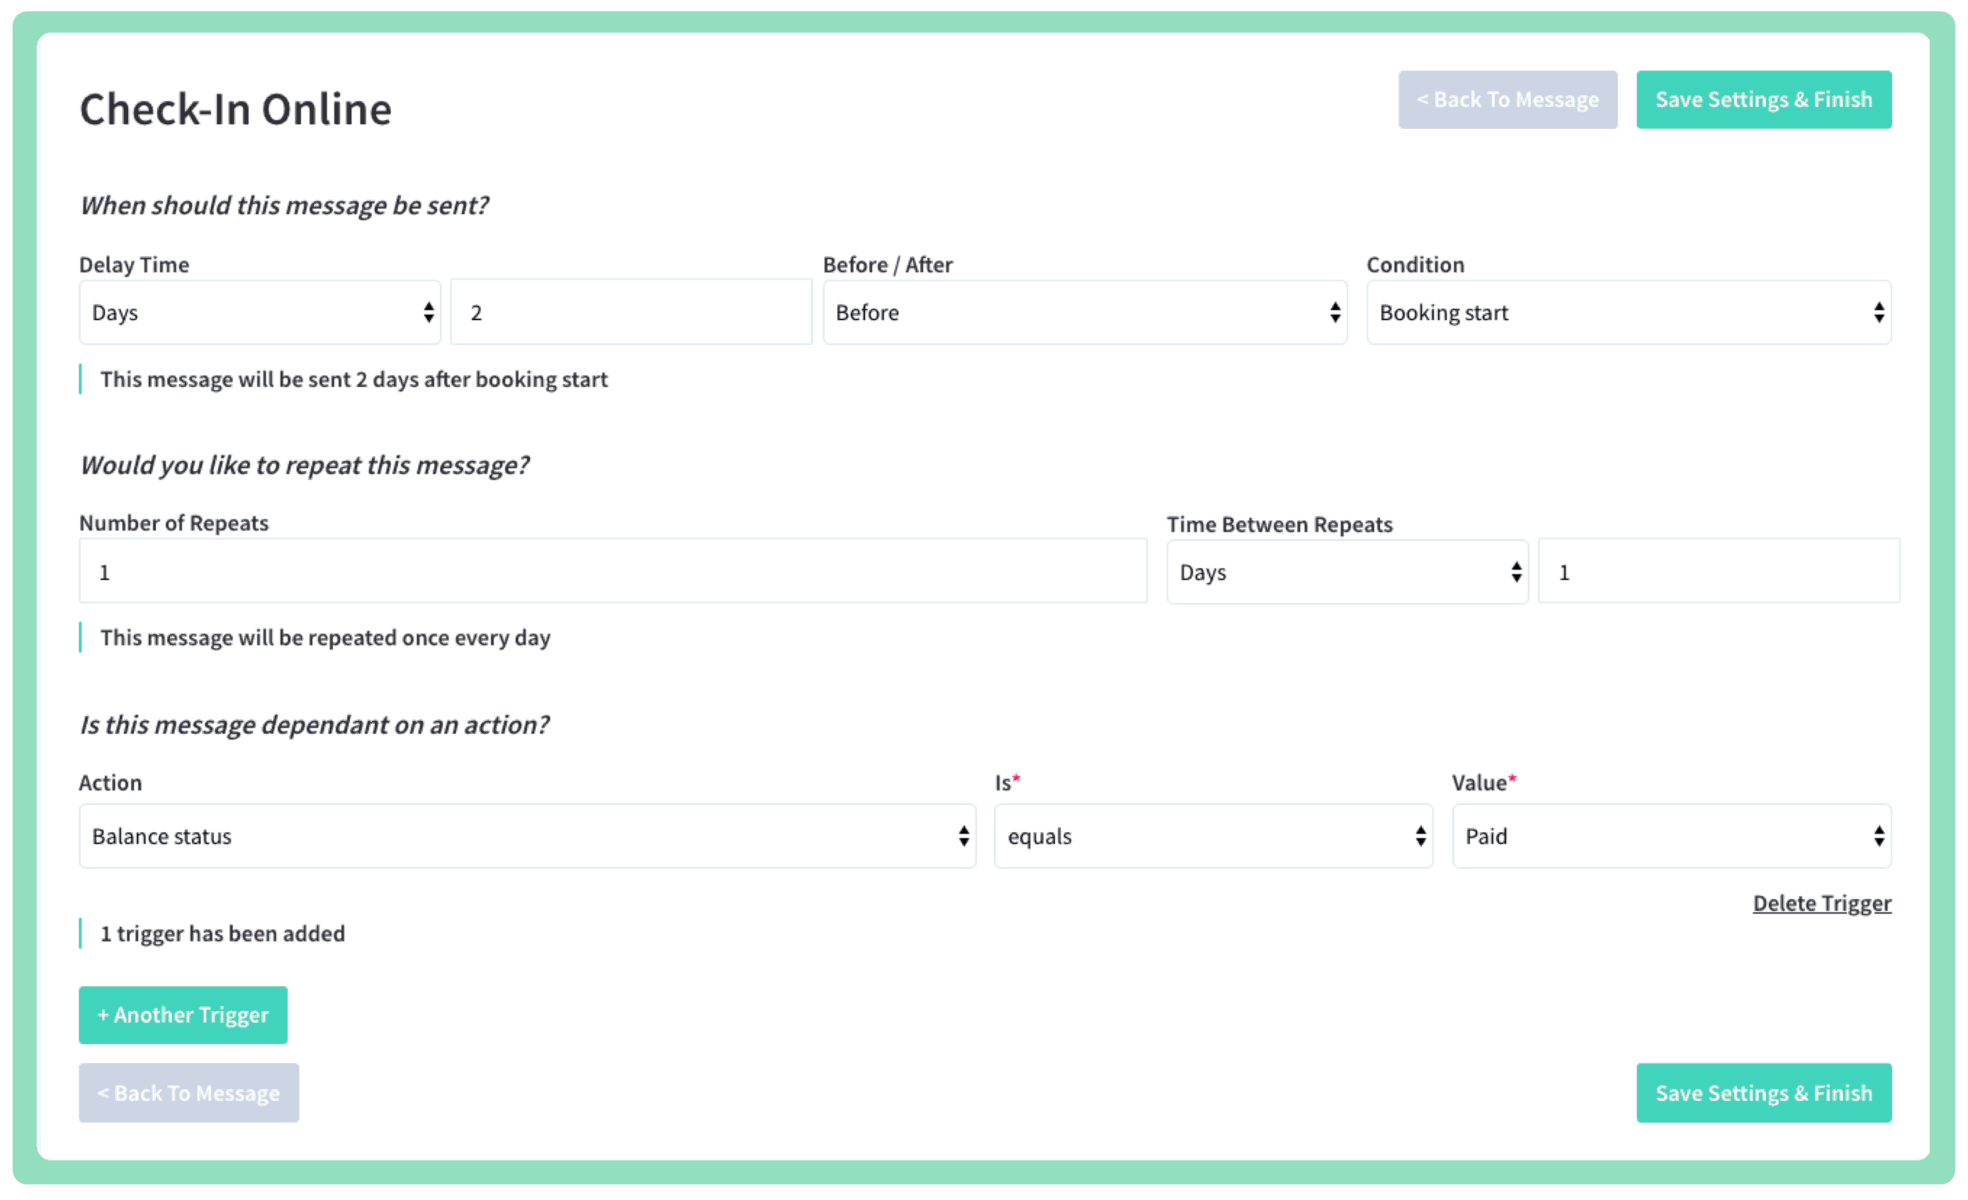
A trigger is an ‘action’ that your guest may do during Advance check-in. For example, you can send an email based on whether the guest has paid a deposit or checked in.
For example a trigger you could add to a check-in email would be:
Balance Status = Paid
Meaning the check-in email would only be sent to the guest once they have paid their remaining balance.
Our list of triggers you can choose from:
First Impressions Rating
Deposit Refunded
Has Checked In
Has Checked Out
Balance Status
Deposit Status
Guest ID Status
Delays
Give some time for your guests to open their messages by setting a delay between each message. Choose a specific number of days, hours or minutes before or after a ‘condition’ so you know exactly when your guest should be getting their emails.
For example a delay you could add to a check-in email would be:
3 Days – After – Booking Confirmation (email)
Meaning the check-in email would only be sent to the guest 3 days after the booking confirmation email is due to be sent.
Our list of conditions:
Booking Start
Booking End
Booking Created
Another Message (one message from your list of messages)
Repeats
If you have an email that you would like to repeat you can choose the number of times to repeat the message and amount of time between them. For example, if you would like your check-in email to be repeated 3 times every 6 hours you can do that to ensure that they check-in in a certain period of time.
Step By Step Guide
Step 1 Option 1:
Add Our Suggested Workflow Templates
We have created five workflows that you can add to your own workflow list in order to get you started. Each workflow caters for different types of bookings, we recommend setting one of these workflows up as your default so you can ensure certain messages are sent at minimum per booking. Once you have added these templates to your list, feel free to amend the message settings per message to what you would prefer, this could include amending the delay, triggers or repeats.
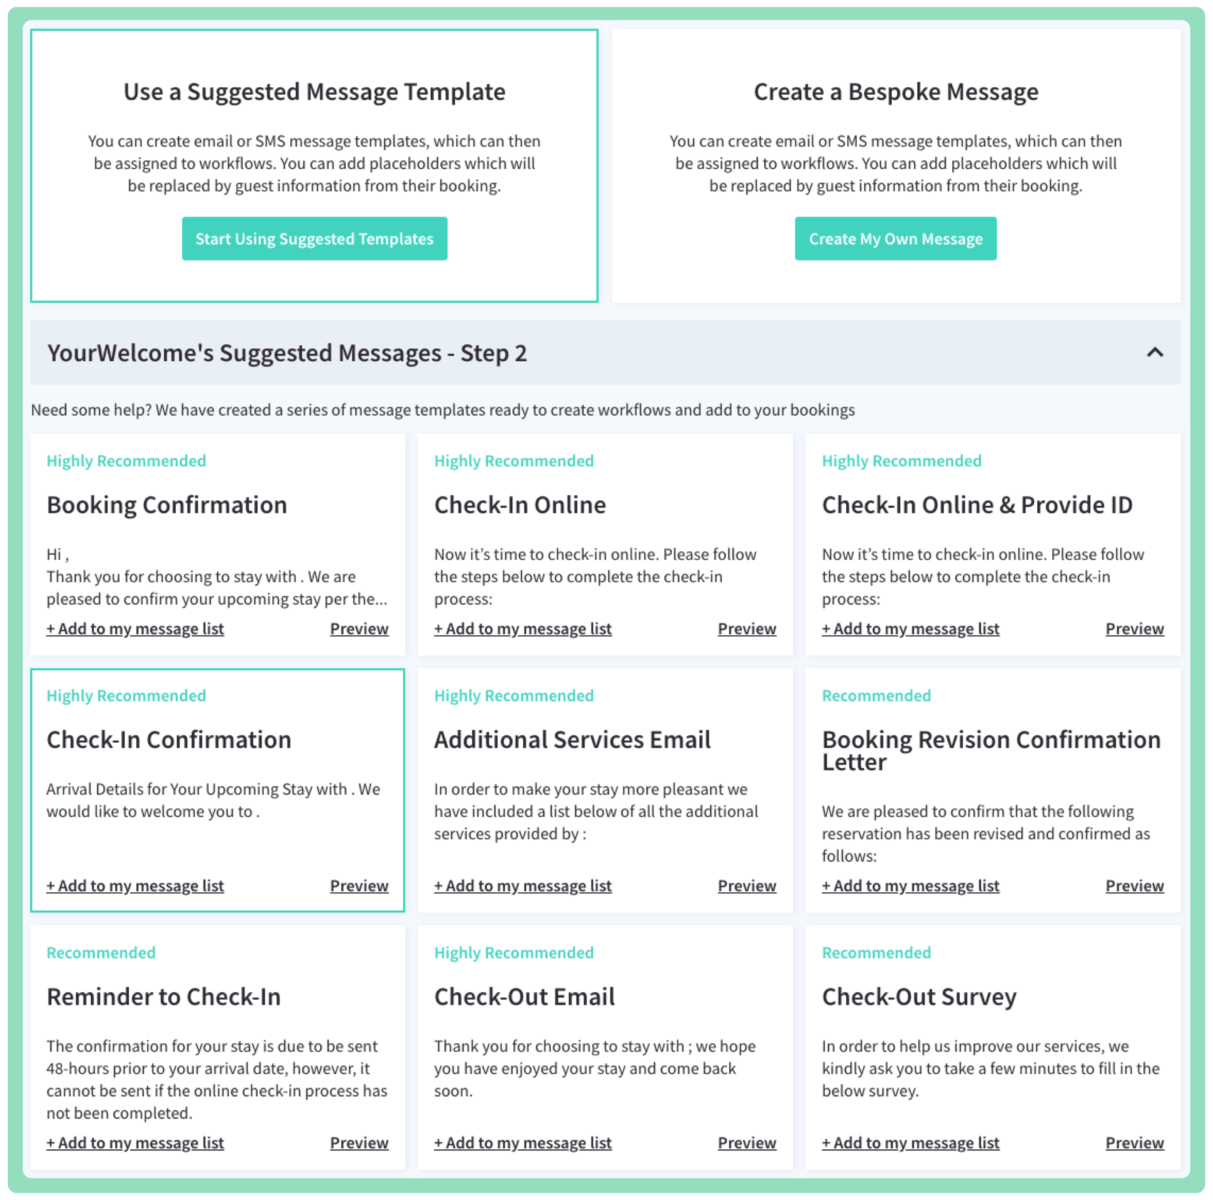
Add Our Suggested Message Templates
We have created several message templates for you to add to your own messages template list. We recommend adding these to your list of messages and amending them to match your tone of voice and call to actions.
Step 1 Option 2:
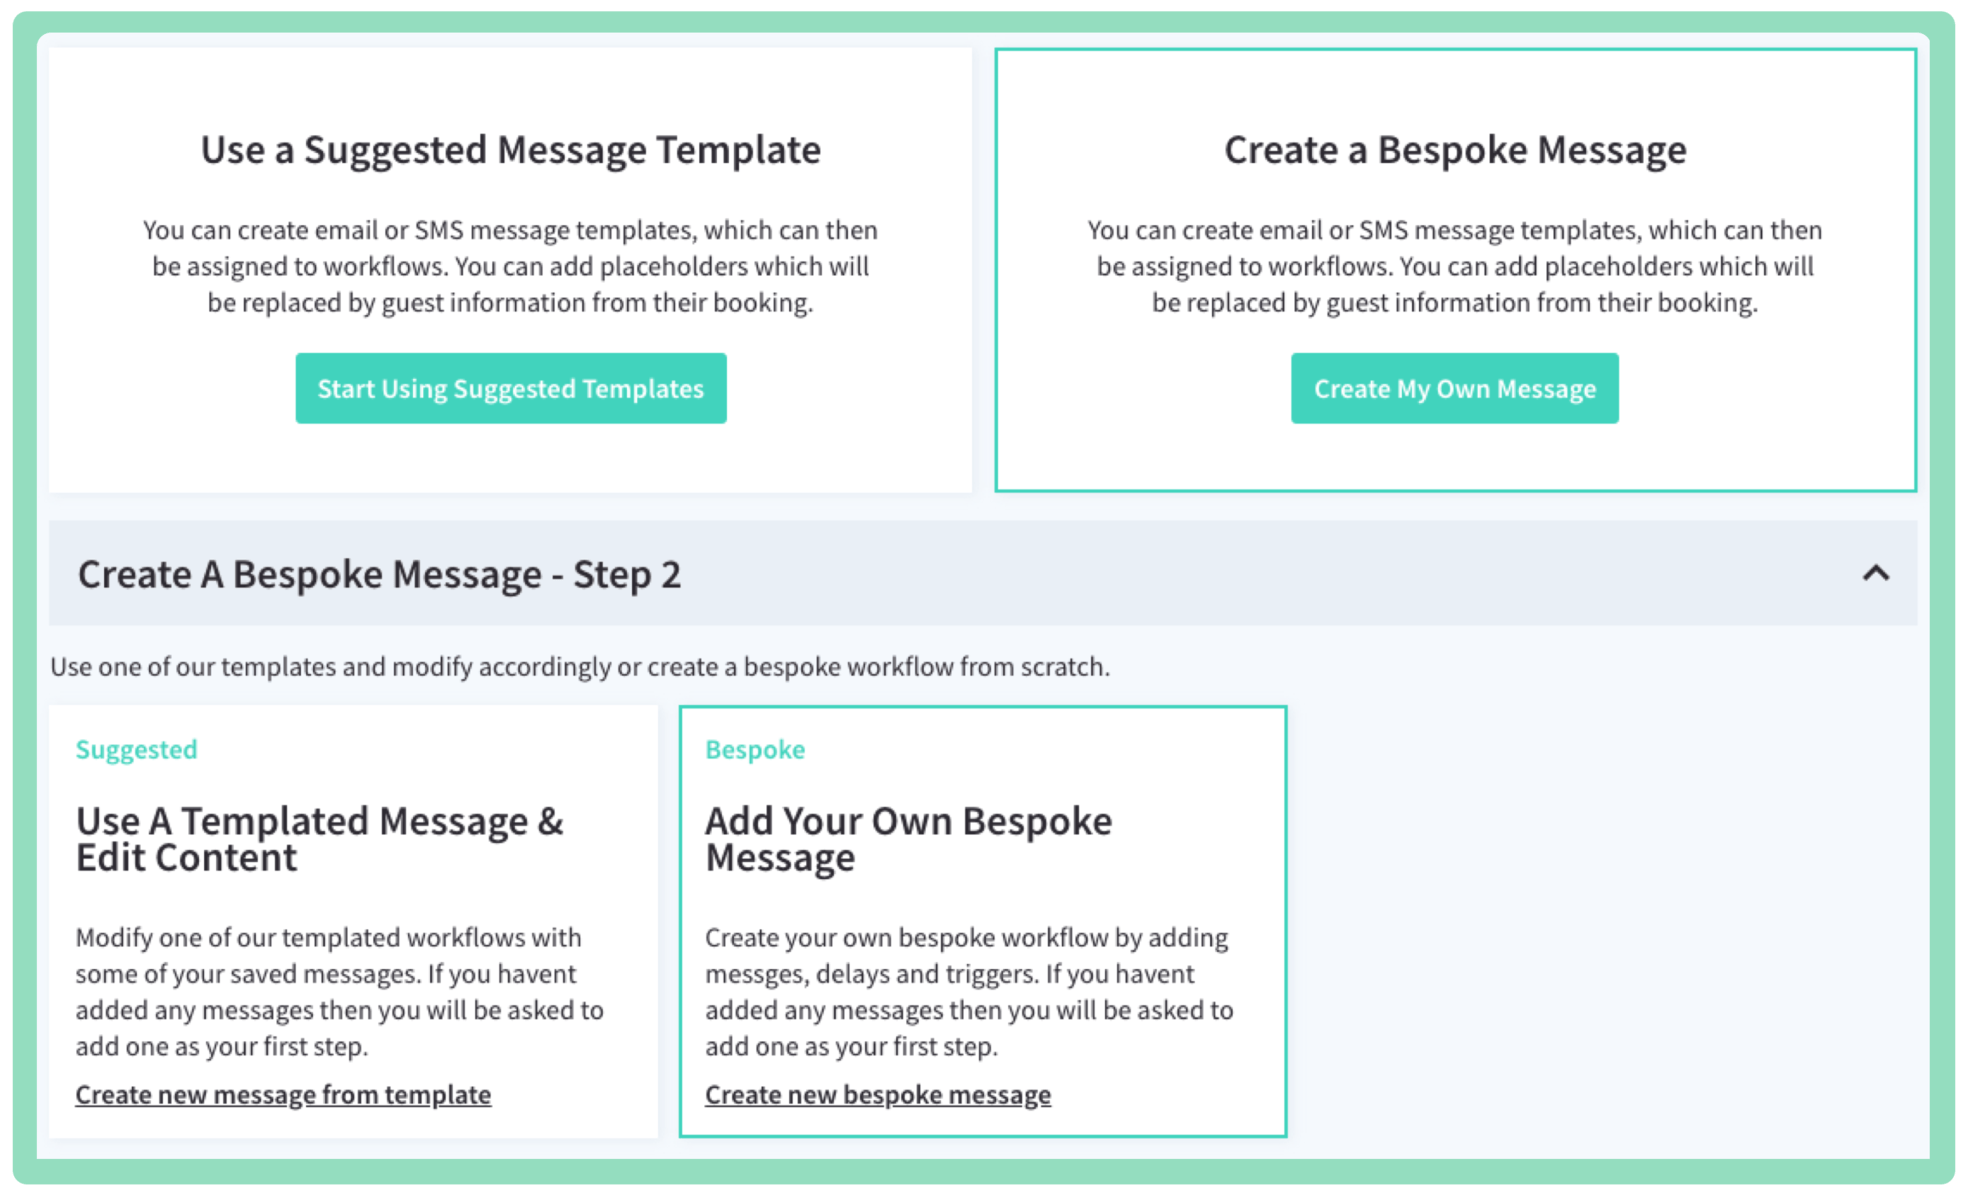
Add Bespoke Messages & Create a Bespoke Workflow
If you already have content for your emails then choose the option ‘Create a Bespoke Message’ and add it as a new message. Once you have your list of messages you can then build your bespoke workflow using our workflow builder.
Workflow Builder
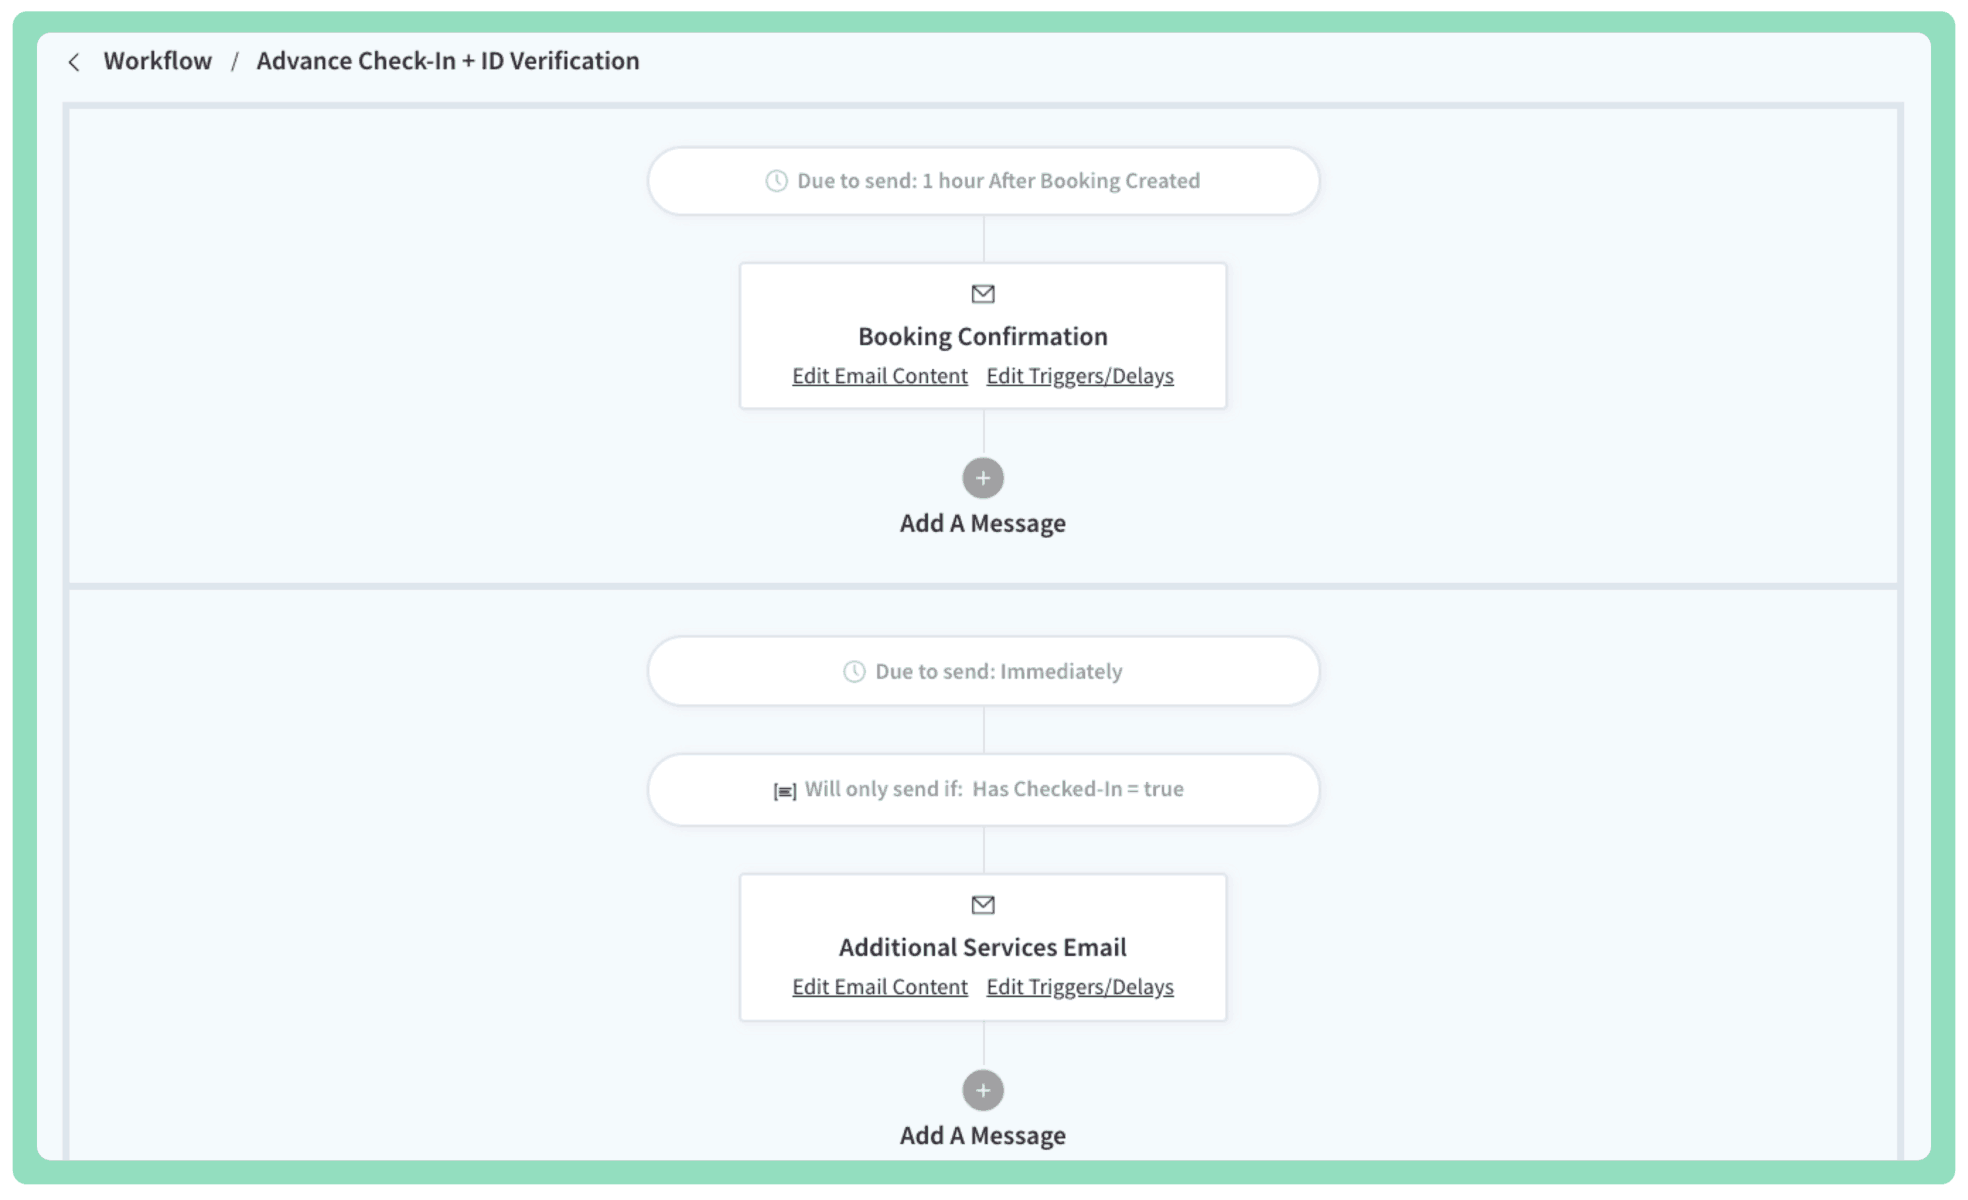
Our drag and drop email builder makes it quick and easy to build your email workflows. Set emails to only be sent if a condition is met (like paying for a booking balance or deposit amount) and even set automated follow up emails if those actions aren’t done.
Add your first message when creating your new workflow and then use our builder to add you additional messages you want your guests to receive afterwards. For each message that is dependant on another; the flow will be appear as continuous vertical flow. For messages that send independently of each other these will appear in a horizontal flow.
Adding Workflows to Bookings
There are two ways you can add workflows to bookings.
- By setting one of your workflows as a default. This means you are guaranteed that the primary guest from every booking will receive emails within that worfklow at a minimum.
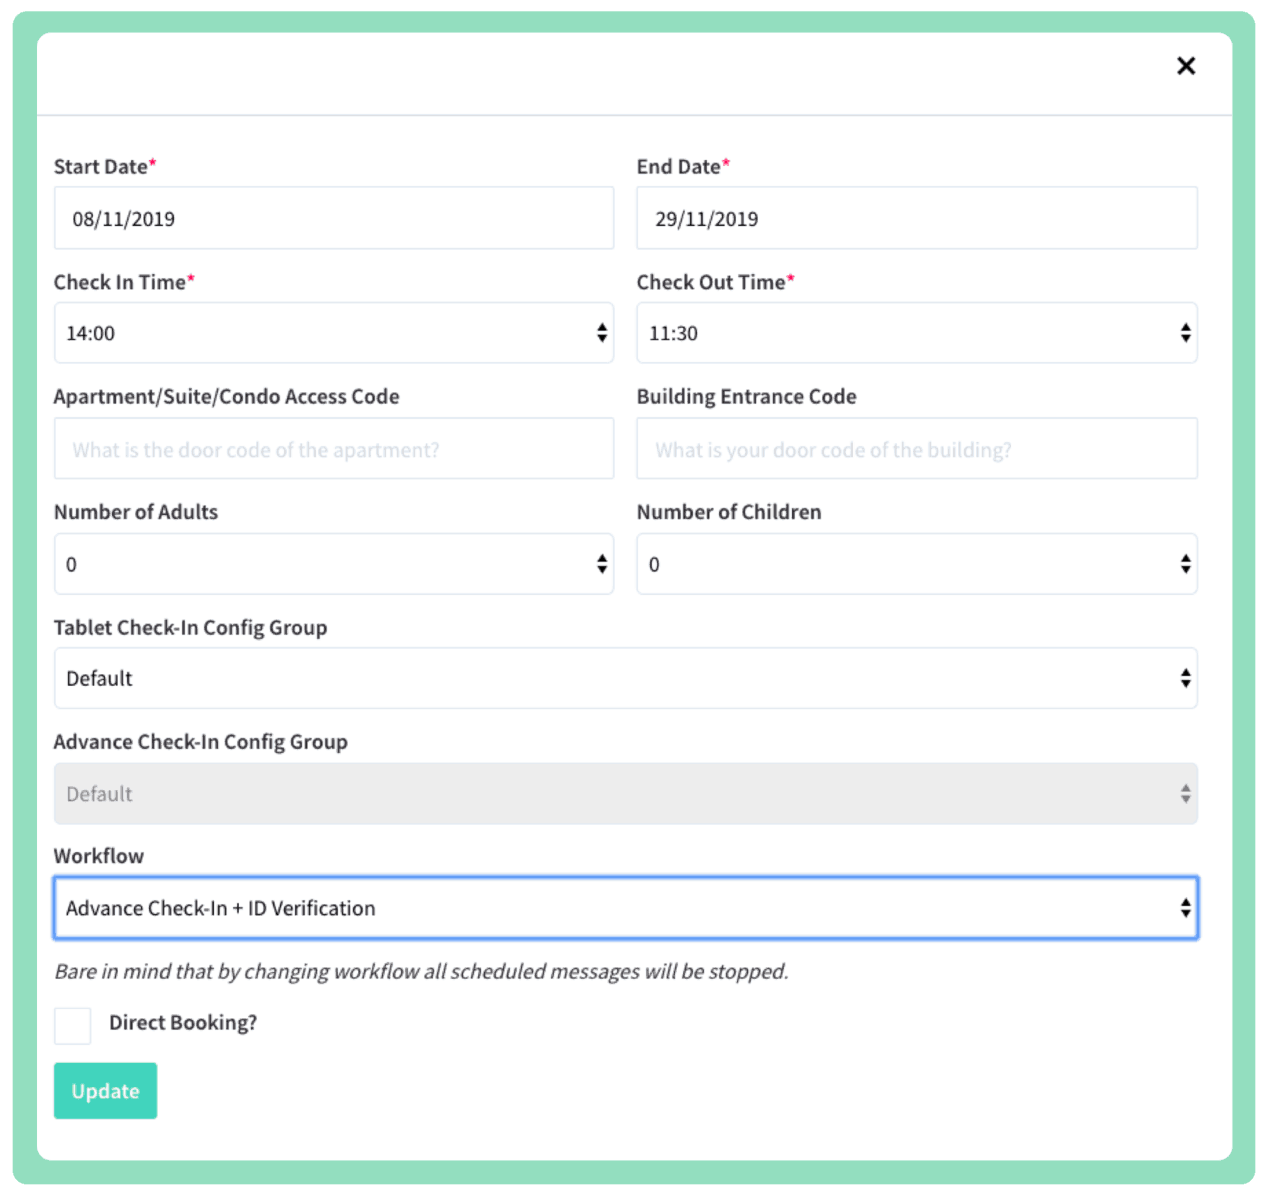
- Manually adding the workflows per booking. Whether your bookings have been added to our system via a PMS or you have added these manually, you will be given the option per booking to change the check-in group, T & Cs group, Message branding and Workflow. We realise not every booking will have the same settings, this is why we have given you complete granularity to change these settings per booking.
Managing Your Workflow On a Booking
Before the booking starts and any emails have been sent you can swap your Worfklow for a different one by editing the booking and choosing another worfkflow from the dropdown.
Once the booking has started or any emails have already been sent you have the option to stop and pause the workflow, with the ability to then resume at any time during the booking. You can stop a workflow at any time and start a new one, or simply pause whilst you verify any documents.
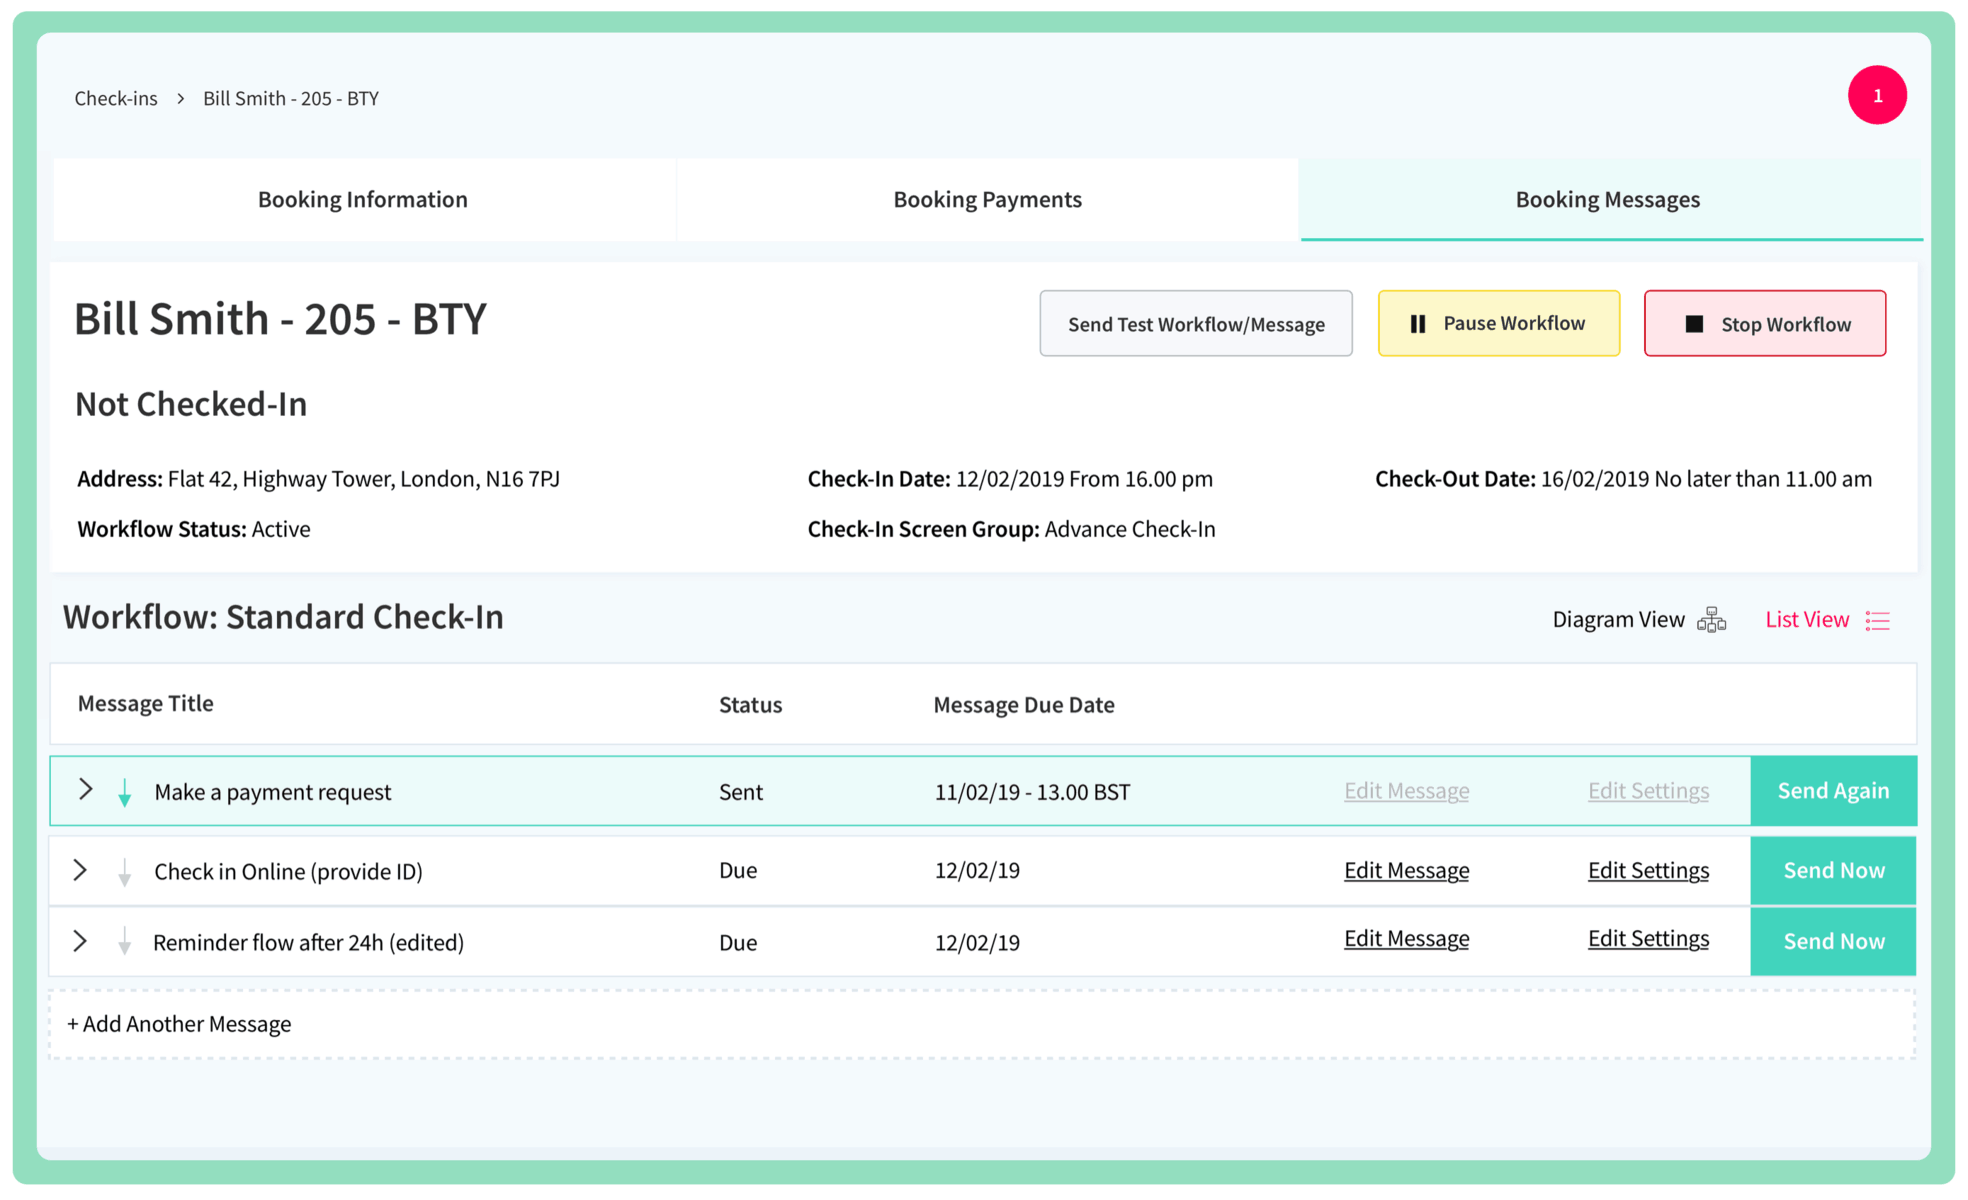
Diagram vs List View
We realise you may want to view what’s happening on your booking in more than just one way, so we have a default view of a simple list with a status of whether your emails have been sent or due to send with the ability to send now and send again.
The diagram view acts as a visual flow of messages down the page with the same options as the list view.
If you need any further assistance creating your messages and workflows please contact us.


